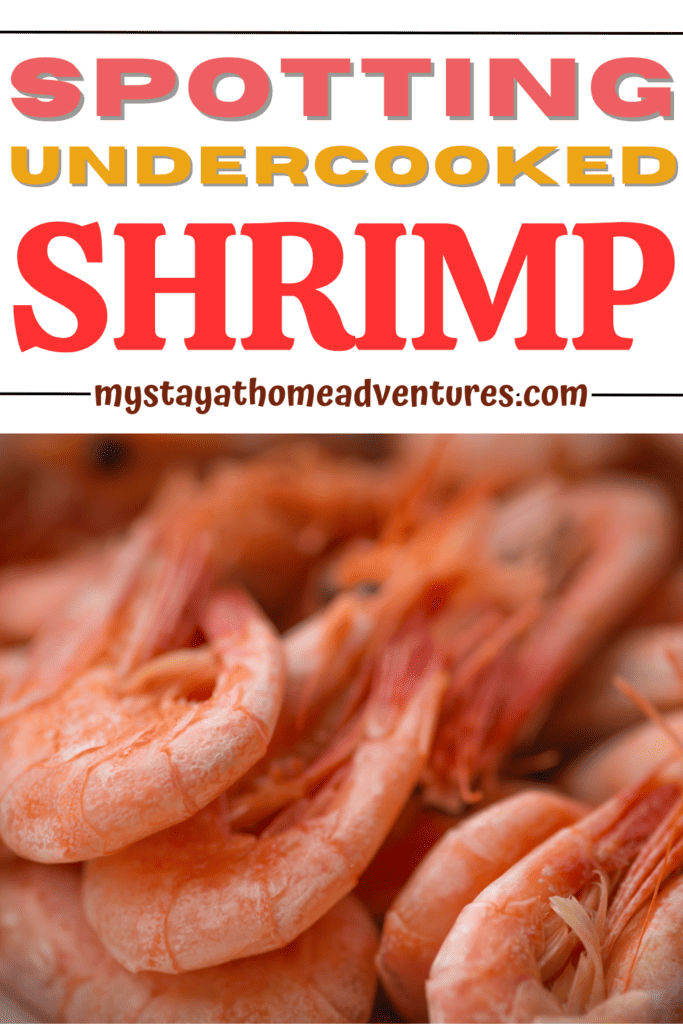
Spotting Undercooked Shrimp
This post may contain affiliate links which might earn us money. Please read my Disclosure and Privacy policies here
Wondering if your shrimp is undercooked? Ensuring your shrimp are properly prepared is critical for your meal’s success and your health. Discover the signs of undercooked shrimp and master the art of cooking them safely and to perfection with our guide.
Key Takeaways
- For perfectly cooked shrimp, aim for a color change from translucent gray to opaque pink or orange and an internal temperature of 145°F (63°C) to ensure the shrimp are cooked through and safe to eat.
- There are different methods to cook shrimp perfectly, such as sautéing, grilling, or boiling; quick cooking techniques are preferable to avoid overcooking and rubbery texture.
- When handling frozen shrimp, make sure to thaw them properly in the refrigerator or using a cold water bath to prevent bacterial growth, and consider deveining them for a cleaner taste and better presentation.
Recognizing Undercooked Shrimp
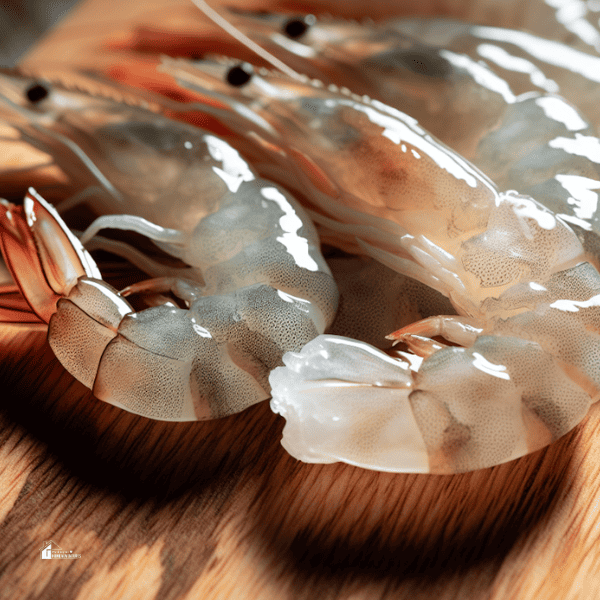
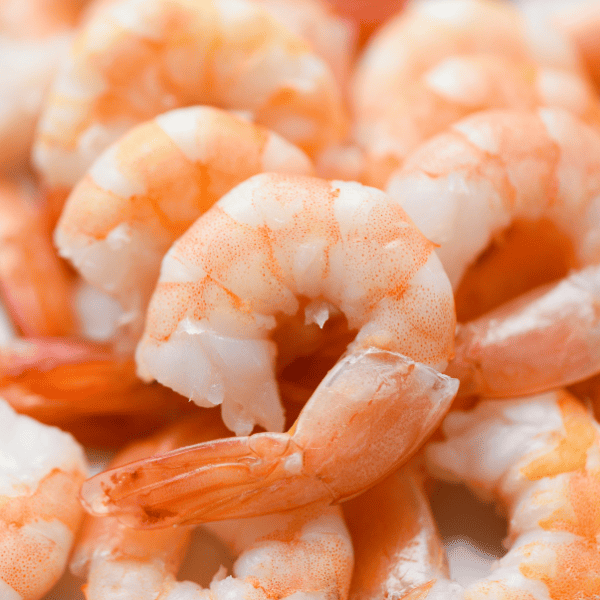
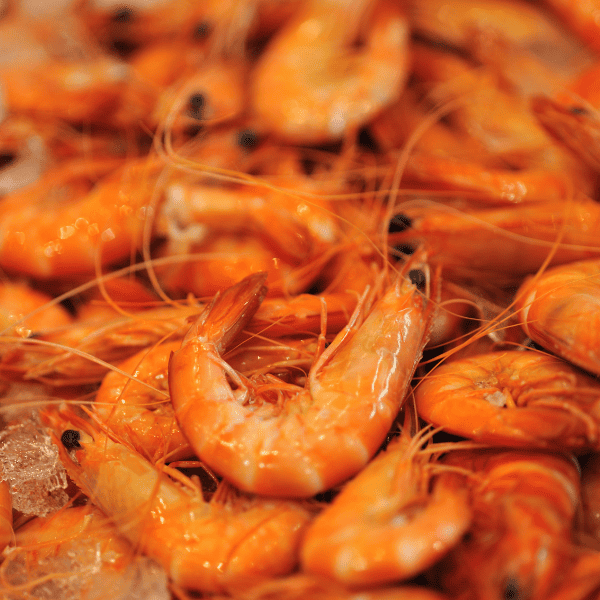
The journey to perfect shrimp begins with knowing how to identify undercooked ones. Ever found yourself staring at your skillet, pondering if those little morsels are ready to serve? Shrimp are still putting on a translucent, grayish performance and are not ready for the spotlight.
You’re aiming for that moment when they’ve donned their pink or orange hues, casting off their translucent attire for an opaque and firm ensemble. This visual transformation is your cue that they’re nearing their prime.
However, it’s not only about the appearance – safety is paramount. The internal temperature of these sea delicacies is a definitive measure to confirm they’re safe for consumption. A target of 145°F (63°C) is the magic number to hit, a critical threshold to keep any uninvited bacterial guests from crashing your dining experience.
Color and Texture
Picture the shrimp in your pan transitioning like actors changing costumes, shifting from a raw, translucent gray to a cooked, opaque pink. This is a sign of a tasty meal ahead and an indicator of doneness. The shrimp’s color and texture are like the tide, signaling when they’re ready to be scooped from their sea-scented sauna. It’s crucial to watch for this shift – the difference between a meal that’s just okay and one that’s truly mouthwatering.
Yet, your senses of sight and touch are instrumental in this culinary journey. As you sauté, grill, or boil, tapping into these visual cues and feeling for that firmness will guide you to that sweet spot where taste and texture collide in perfect harmony.
Internal Temperature
In the realm of cooking shrimp, it’s not only about the external signs. The internal temperature is like the core of a planet – it tells you what’s really going on inside. Reaching that safe harbor of 145°F (63°C) ensures that your shrimp are not just cooked, but also safe from the foodborne villains lurking in undercooked seafood. This is particularly vital for those more susceptible to foodborne pathogens, including the elderly, pregnant women, and children.
Envision wielding a thermometer as your sword, ensuring each bite is not only succulent but also a bastion of safety. It’s a small step that makes a big difference, giving you peace of mind as you indulge in the fruits of the sea.
How to Cook Shrimp Perfectly
Equipped with the understanding of undercooked shrimp appearance, it’s time to divert our attention to mastering the cooking process for delectable shrimp. Whether you’re aiming to sauté, grill, or boil, each method has its own rhythm and pace, and the key to unlocking their potential is in the seasoning and the vigilance you maintain as they dance in the heat. Keep in mind, shrimp are delicate and can quickly overcook, turning from divine to rubbery in no time.
Marinating offers a prelude to flavor, but it’s a delicate balance – too long in the marinade, and your shrimp might lose their textural integrity. The spotlight here is on quick cooking techniques, such as a swift sauté or a brief swim in boiling water, which are your best bets for avoiding the tragedy of overcooked shrimp.
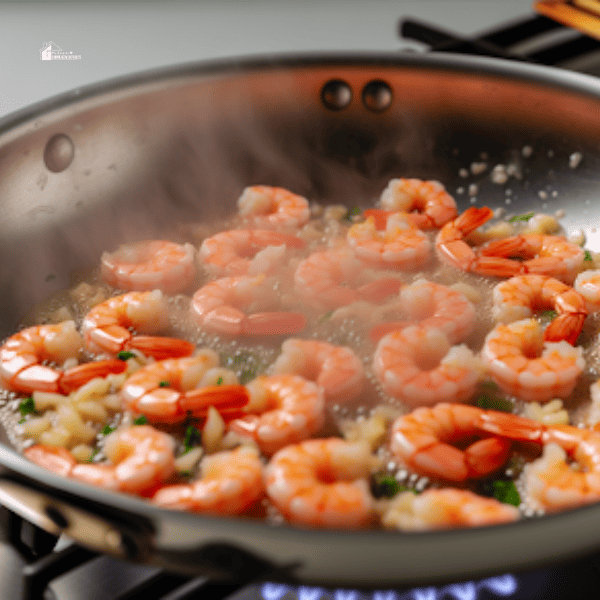
Sautéing Shrimp
Sautéing shrimp is like conducting an orchestra – it’s all about timing and technique. For that golden sear, you’ll need a pan that can handle the heat, such as copper or cast iron. Starting with a cold pan? That’s a strategy to gain control, allowing for even browning without rushing to an overcooked finale. And when it comes to flavor, it’s all about the pre-show prep. Tossing your shrimp with seasonings like salt and sugar can enhance their natural sweetness and contribute to a caramelized crust.
Now, imagine laying your shrimp out like sunbathers in a single layer, giving them space to sear without the need to nudge them. Sauté each side for a mere minute or two on medium-high heat, and you’ll have shrimp that are just opaque, avoiding the dread of rubbery bites. It’s a quick pirouette in the pan, one that requires your full attention, but the results are worth the spotlight.
Grilling Shrimp
Ah, grilling shrimp – it’s the culinary equivalent of a summer fling, quick and full of flavor. Before you let your shrimp hit the grill, lightly oil them to prevent a sticky breakup; canola oil, with its high smoke point, is like a trusty friend here. If you’re dealing with the more petite members of the shrimp family, thread them onto skewers or tuck them into a grill basket to keep them from slipping through the grates.
The preheated grill is your stage, and those shrimp are ready for their close-up. Give them about 2 to 3 minutes of fame on each side, just enough to don that charred exterior. Flip them in the order they hit the grill, maintaining even cooking and dodging the overcooked bullet. Just like that, you’ll have grilled shrimp that are smoky, succulent, and sure to steal the show.
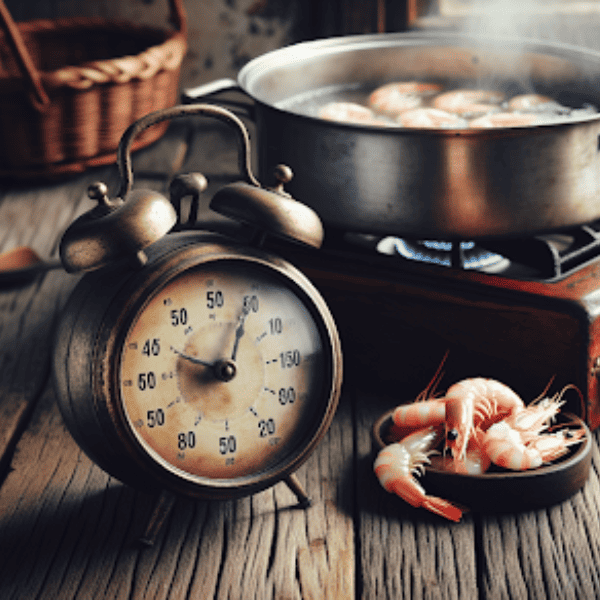
Boiling Shrimp
Boiling shrimp is a classic act, one that’s as simple as it is satisfying. Picture a large pot of salted water, singing with the zest of lemon juice—it’s your cauldron of potential. Toss in your shrimp, and watch as they transform. Cooking times are as varied as the sea: around 2 minutes for most, with the shell-on kind taking a bit longer to reach their tender best.
If you’re seeking the juiciest texture, let the shrimp keep their shells during their bath. And when it’s time to present them, perhaps for a shrimp cocktail, leave the tails on for a touch of elegance.
Whether in a cocktail or a curry, boiled jumbo shrimp emerge as plump, juicy morsels, ready to meld with flavors or stand deliciously on their own.
Handling Frozen Shrimp
Frozen shrimp offers a plethora of possibilities, but they require careful handling during thawing to prevent any potential bacterial growth. It’s a cold truth: room temperature and hot water are foes in this scenario, potentially starting an unwanted cooking process or inviting bacteria to the party.
So, what’s the proper way to coax frozen shrimp from their icy slumber?
Thawing Process
The refrigerator serves as a dependable companion in the process of thawing frozen shrimp. Here are a few methods you can use:
- Remove the shrimp from their packaging and let them chill out in the refrigerator for up to 24 hours, giving them time to thaw gently.
- If you’re pressed for time, you can use a cold water bath in the fridge to speed up the process to about 10-15 minutes.
- For immediate needs, you can place the shrimp in a sealed bag and submerge it in cold water for 20-30 minutes. Remember to stir the water occasionally to break up any icebergs.
Be mindful to only thaw what you’ll cook, as refreezing is a no-go for seafood safety and quality. Once thawed, pat your shrimp dry with paper towels to prime them for the pan or the pot, ensuring they’ll brown beautifully and cook evenly. Keep in mind that thawed shrimp can stay in your fridge for a brief sojourn of one to two days before they must hit the heat.
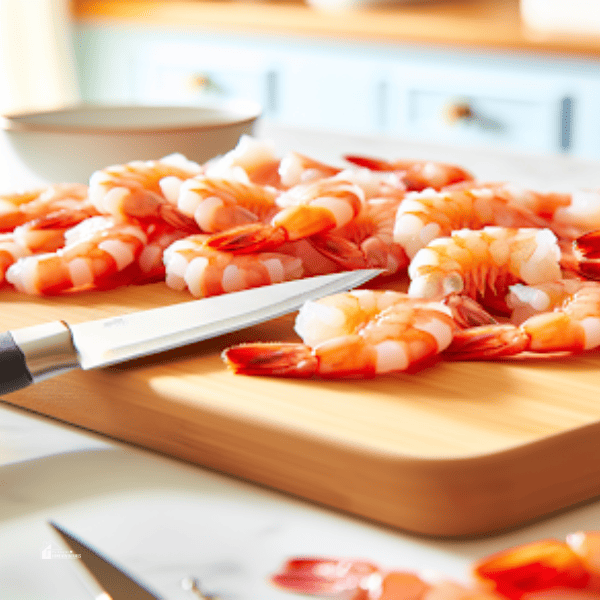
Deveining Shrimp
With your shrimp now thawed, let’s delve into the process of deveining shrimp. Some might say it’s a tedious task, but it’s one that separates the amateurs from the connoisseurs. Whether using a paring knife or your fingers, the goal is to remove the shrimp’s digestive tract, which can carry grit and detract from the overall experience. It’s not about vanity; it’s about the clean taste and smooth texture that comes from a shrimp that’s free of its past meals.
For those who find beauty in presentation, keeping the shell around the tail can make your dish look as good as it tastes, especially if you’re serving your shrimp as finger food. And don’t let the shells go to waste – they’re the secret ingredient for a rich and flavorful shrimp stock. A final rinse under cold water, and your shrimp are ready to face the heat, primed for perfection.
Preventing Overcooked Shrimp
Now, you have your shrimp prepared and ready to cook. But how do you ensure they don’t go from plump to parched? It’s all about vigilance. Keep a watchful eye on the heat and the clock, as shrimp can go from succulent to stiff in less than a song’s length.
If you seek a fail-safe cooking method, cooking them in their shells with olive oil is an effective protection against the dryness that overcooking often causes.
Monitoring Cooking Time
Timing is everything when it comes to shrimp. The size of your shrimp plays a leading role in determining their stage time – from about 3 minutes for the medium variety to up to 7 minutes for the jumbo headliners. It’s a delicate balance, as smaller shrimp are more prone to quick overcooking if left unattended. Generally, regardless of the method, shrimp should be in and out of the kitchen limelight in under five minutes.
As they near their final act, remove them from the heat just before they reach full opacity. This little trick, known as carryover cooking, allows the residual heat to finish the job, ensuring your shrimp exit the stage at their peak, not past it.
Visual Cues
Your vision is one of the most powerful tools in your cooking toolbox. As your shrimp cook, look for them to change from a grayish transparency to a firm and opaque pink, curling slightly into a C-shape – that’s your signal for “It’s Showtime.” If they’ve curled into an O, however, that’s an overcooked SOS, and it’s time to rethink your strategy.
When pan-searing, the moment to flip is when you see those pink edges and spotty browning on the first side, a teaser for the deliciousness to come. It’s like watching for the curtain call – these visual cues are the standing ovation for a shrimp performance done right. They tell you that your shrimp are fully cooked and ready to take their place in the spotlight of your dinner table.
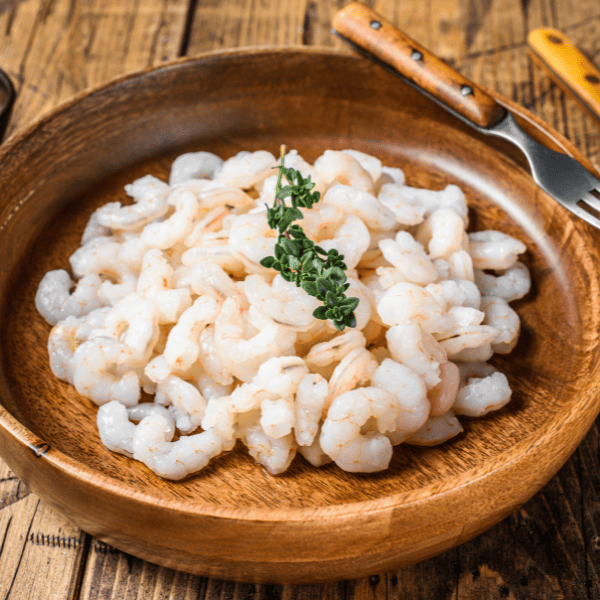
Serving Suggestions
Having mastered the cooking process, it’s time to discuss the grand finale – presenting your shrimp. Whether nestled on a bed of pasta or skewered between vibrant veggies, the right accompaniments can turn your shrimp dish from a solo act into a symphony of flavors.
Side Dishes
The right side dish can elevate your shrimp to gastronomic stardom. From the simplicity of Perfectly Seasoned Quinoa to the rustic charm of Oven Roasted Vegetables, each side can play up the shrimp’s flavor profile. If you’re feeling adventurous, why not try pairing your shrimp with a Fennel Celery Salad or a Coconut Rice for a tropical twist? For those cozy evenings, Cheesy Baked Gnocchi or a Creamed Spinach can offer the comfort that complements the seafood’s lighter notes.
And let’s not forget about the classics – Pesto Penne Pasta, a light and herby Italian staple, or a crisp and refreshing Classic Coleslaw for those summer barbecues. Whatever the choice, your side dish should be a supporting character that lets the shrimp shine, while adding its own touch of magic to the plate.
Sauces
A sauce can be the secret handshake between shrimp and their sidekicks, a binding element that brings the whole dish together. Here are some sauce options to try with your shrimp:
- Garlic Butter Sauce: Drizzle your perfectly cooked shrimp with this sauce for a rich and savory experience.
- Cocktail Sauce: Dip your shrimp into this tangy sauce for a classic touch.
- Lemon Herb Sauce: If you’re in the mood for something that zings, this sauce with its bright citrus notes is a refreshing choice that complements the shrimp’s sweetness.
Don’t be afraid to mix it up with a Creamy Dill Sauce or a Spicy Mayo for some creamy heat. Remember, sauces are more than just a topping; they’re the final note that can turn your shrimp dish into a culinary symphony, a burst of flavor in every bite that leaves you and your guests craving for an encore.
Food Safety Concerns
A triumphant applause for your shrimp masterpiece can only be achieved with an impeccable performance in food safety. After all, it’s not just about the taste; it’s about ensuring the show goes on without a hitch. The dangers associated with undercooked shrimp are significant, and being aware of them is crucial to ensure every meal is both tasty and safe.
Risks of Undercooked Shrimp
Undercooked shrimp can be a breeding ground for unwanted critters like bacteria and parasites. These uninvited guests, such as Vibrio and Salmonella, can lead to foodborne illnesses that you definitely don’t want to be part of your dining experience. Symptoms can range from the uncomfortable to the downright dangerous, making it clear why achieving that perfectly cooked shrimp isn’t just about culinary prowess—it’s about care and caution when dealing with raw or undercooked shrimp.
Proper Storage
Once your shrimp have been cooked and served, their storage method becomes critical. Here are some guidelines to follow:
- Cooked shrimp should be stored in the coldest part of the refrigerator.
- Neatly tuck them into an airtight container.
- They can be stored in the refrigerator for a limited engagement of 3-4 days.
- If you’re looking to extend their shelf life, the freezer can be your ally for up to three months.
- Just make sure they’re wrapped up tight to avoid the dreaded freezer burn.
Fresh raw shrimp, on the other hand, have a shorter shelf life; they demand immediate attention and should be consumed within a couple of days for the best performance.
Summary
As the curtain falls on our culinary show, we’ve armed you with the know-how to spot undercooked shrimp, wielded techniques to cook them to perfection, and shared the secrets of storage and safety. Remember, the journey from sea to plate is one of care, precision, and a dash of creativity. With these tips and tricks under your chef’s hat, you’re set to deliver a seafood experience that’s sure to get rave reviews. Here’s to your next shrimp sensation—bon appétit!
Frequently Asked Questions
How can you tell if shrimp is undercooked?
You can tell if shrimp is undercooked by checking for visual cues such as curled and opaque shrimp, and avoiding those that are gray and translucent with uncurled tails. This will ensure that your shrimp is perfectly cooked and safe to eat.
Is already cooked shrimp safe to eat?
Yes, cooked shrimp from a grocery store is safe to eat as long as it has been properly handled and stored. It does not need to be re-cooked before consumption.
Is it OK if raw shrimp is pink?
Raw shrimp is okay if it is pink or grayish in color. However, if it is yellow, brown, or black, it may be spoiled. It should also be firm to the touch and bounce back when pressed.
Is it OK to eat slightly undercooked shrimp?
No, it's not okay to eat slightly undercooked shrimp as it poses a risk of disease. You should cook shrimp until they are opaque or pink, or have reached an internal temperature of 145°F (63°C). Most harmful bacteria and viruses are eliminated during the cooking process.
Is it safe to thaw frozen shrimp on the countertop?
No, it's not safe to thaw frozen shrimp on the countertop because it can promote bacterial growth. It's best to thaw them in the refrigerator or by submerging them in cold water.