The Ultimate Guide to Planning a Modern Walk-In Shower Renovation
This post may contain affiliate links which might earn us money. Please read my Disclosure and Privacy policies here
A walk-in shower can add a beautiful open look to any bathroom. However, the important, but often overlooked aspects of the design, are the drains, slopes, and waterproofing that go under the tiles and make the shower function as a stress-free gorgeous addition to your home.
This article helps educate homeowners to avoid costly mistakes – from structural leaks to tiles popping off the wall in five years.
The Structural Reality of a Curbless Entry
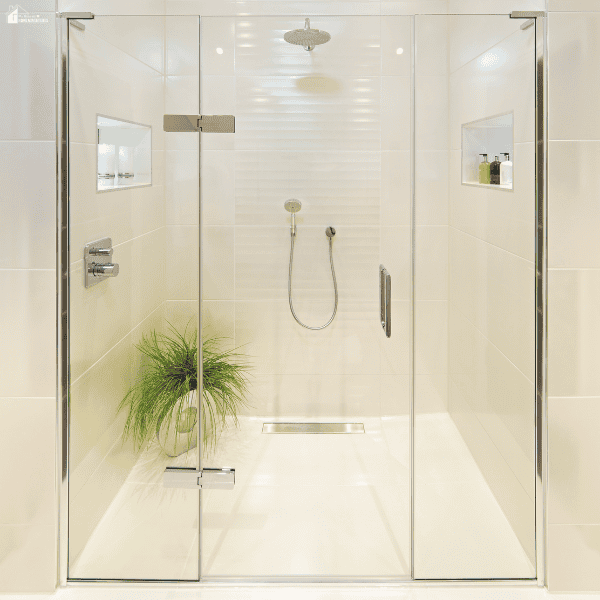
A real walk-in shower has no step, no lip, no threshold. The shower floor is level with the bathroom floor. Simple to describe. Tricky to pull off.
You can go two ways to get there. The first digs right into the subfloor, as in cutting the floor structure of the existing floor and lowering the shower region to situate the tray completely flat with all other tiles. Timber-framed floor? Modify or sister off those joists. Concrete slab? Grind or cut concrete. More labor, more stable.
Method number two is building up the rest of the bathroom floor to match an elevated shower base. Works wonderfully in certain scenarios, but will heighten your entire room including low-clearance doors, vanity heights, transition strips to other rooms.
Neither method is better than the other, just depending on your floor construction, current bathroom height, and flush distance. The important thing is one of them MUST occur. If you opt to slide in a small tray at the ground level as a shortcut, you will be left with a 20-30mm lip. Not a true curbless entry, and counteracts access.
Drainage Physics and Why Slope Direction Matters
Traditional shower trays drain from a central point and have the floor sloping inward from all four sides. This system works well when contained in an enclosure with a rigid tray.
When used in a walk-in layout, however, it causes two issues: your feet are not level on a four-way slope, and it's impossible to cleanly lay large tiles over a compound gradient.
The perfect walk-in shower needs a linear drain positioned against the rear wall, allowing a one-way slope, a single uniform gradient that travels from the entrance to the rear wall drain. The gradient needs to be a minimum of 1:80 (that's 12.5mm of drop per metre of run) to carry water consistently and prevent puddling.
But it's more than practical vanity. A single gradient is easier to tile to, less unnerving to stand on, and far more suitable for the current fashion for large-size porcelain slabs, which can't be cut and bent to cover compound curves.
The drain itself is also more hygienic, as the full-width channel captures runoff from the full-width floor, unlike traditional designs that must depend on water finding its way from distant corners to a central point.
Advanced Waterproofing – This is Where Renovations Go Wrong
One must be aware that the waterproofing requirements in a walk-in shower are more demanding than those in an enclosed cabin. As water is sprayed in several directions and the water is not enclosed on all sides, moisture can spread over a larger area.
If the installation of the waterproofing is faulty, it can lead to mold, rot, and the tiles coming off. These issues typically only become apparent many months, if not years after the installation.
Waterproofing membrane specs stipulate that at least 1500mm outward and 2000mm upward from the shower rose is required. The more you cheat that spec, the more you live to regret it. In wet room conversions where the shower blends openly into the rest of the bathroom, the entire floor area and lower wall sections need to be treated as a wet zone.
Understanding these principles yourself is important, but executing the structural modification, gradient prep, and membrane system requires licensed professionals who know local building standards. For homeowners in the region, working with specialists in shower renovations newcastle ensures the subfloor work and tanking are done to code before anything else goes on top.
You want solid coverage of membrane to all corners, including the floor-to-wall juncture and especially at the channel drain fitting. That's the minimum standard.
These junctions are the failure points – a membrane that's applied correctly across the flat surfaces but left unbonded at corners offers almost no protection, because that's where water pressure concentrates.
Glass Panels – The Numbers That Actually Contain Water
A glass screen without a frame on a walk-in shower does not only serve a decorative purpose, it also manages splashes. Is your bathroom floor protected from excess water? The answer depends on how well your glass screen manages splashes.
To ensure that your bathroom floor stays dry the fixed glass panel of the screen should be at least 1000mm to 1200mm wide. This way, it can intercept the spray pattern produced by a standard 200-250mm rain showerhead.
If the glass panel is narrower, water droplets can escape over the edges, especially if the shower head is positioned on the side closest to the open screen. This is because the mist created by overhead rain showers is wide and low-velocity, and drifts laterally. A narrow screen does not intercept the mist on the outer edges.
The glass pane should be at least 10mm toughened glass. Thinner glass panels are unable to stand on their own and will flex under their own weight. This causes the silicone seals at the base to give way sooner.
If your layout allows for it, an angled or perpendicular panel, also known as a return panel, can help contain water without the need to fully enclose the shower. A 300-400mm return on the open side helps contain the drift that escapes the single flat panel.

Tile Selection – Safety Versus Aesthetics
Who has the time or energy for squeegees and deep scrubbing? And guess what? Easy-to-clean showers are often synonymous with easy-on-the-eyes showers. Because the less elbow grease your shower demands, the cleaner and newer it will look for longer.
Easy-to-clean design choices include using large-format slabs in place of tiles where possible (fewer grout lines) and opting for seamless materials, both of which minimize the surface area available for soap scum and mold to colonize.
The seamless, near-groutless look of large-format porcelain slabs and walk-in showers is undeniably sexy, and widely photographed as a result. But as with any looker, large format brings its own special set of installation challenges, one of which is cutting.
Achieving the correct 1:80 gradient in a walk-in shower in the rear tiles is the sort of master touch that separates the qualified from the weekend DIY enthusiast. The rear tiles need to be cut on a slight bias to follow the slope. It is an angled cut that keeps the tile face level while the bed beneath carries the fall.
Done poorly, and the tiles end up slightly bowed or the slope direction becomes inconsistent.
Mosaic tiles (typically 48x48mm or smaller) work from a completely different principle. The high density of grout lines creates natural mechanical grip for wet feet, often achieving an R11 slip-resistance rating without any texture added to the tile face itself.
The grout lines also conform naturally to the drainage slope without complex cuts. The maintenance load is higher, but for households with elderly members or young children, the safety margin is worth it.
Epoxy grout should be used in either case. Unlike cement-based grout, it doesn't absorb water or stain, and it resists mold growth without sealant reapplication. The installation window is shorter and less forgiving, but the long-term performance difference is significant.
Ventilation and Moisture Control
A completely enclosed shower cabin traps steam inside until the door is opened. An open walk-in shower releases steam constantly into the room. This difference is not trivial – it means every square inch of the bathroom can potentially become warm and damp every time you use the shower, and it adds a bit of urgency to the business of choosing and installing an extraction system that simply works.
A mechanical exhaust fan positioned directly above the shower splash zone is non-negotiable in an open layout. The fan needs to be ducted to the outside (not just into a ceiling cavity) and sized appropriately for the bathroom volume – not a standard 100CFM unit that was spec'd for a small enclosed bathroom.
Pairing the exhaust fan with underfloor heating under the bathroom floor serves a secondary purpose beyond comfort. The heated floor surface accelerates evaporation after showering, reducing the time moisture sits on the tile surface and the floor-to-wall junctions. It also reduces the temperature differential between the floor and ambient air, which is what drives condensation on cold surfaces.
Valve Placement and Plumbing Strategy
One simple design choice can save time and money later. Place the shower controls on the wall opposite the shower head during the initial renovation. This small change costs very little during construction. However, moving the controls later can be expensive.
This layout lets you turn on the shower and adjust the water temperature before stepping into the spray. It also gives easier access to the mixing valve for maintenance. In addition, a caregiver can adjust the water temperature without entering the shower.
A thermostatic mixing valve also improves comfort and safety. It automatically adjusts to changes in water pressure. As a result, the water temperature stays consistent, even when someone uses another tap or shower elsewhere in the house.
Building in Future-Proofing From the Frame Stage
Walk-in showers offer a timeless look that suits many bathroom styles. Curbless designs also improve accessibility. They provide enough space for mobility aids and shower chairs. You can also install grab rails later without changing the visible finishes.
However, grab rails need solid backing behind the wall. They cannot be secured to tiles over a hollow cavity. During framing, install structural blocking, such as timber or a steel plate, at the correct height. If you skip this step, you will need to open the walls later to add it.
Adding structural backing during construction takes about an hour. Retrofitting it later can require half a day of demolition. The same applies to a fold-down shower bench or a built-in seat. Planning for these features early makes future upgrades much easier and far less expensive.
A walk-in shower done properly is a major investment in the value and liveability of the home. The details are the least visible parts of it.