How to Make Cheeses and Yogurt at Home: Mastering Small Milk Pasteurization Machines
This post may contain affiliate links which might earn us money. Please read my Disclosure and Privacy policies hereEmbarking on the journey of creating homemade cheeses and yogurt begins with understanding the importance of proper milk pasteurization. Pasteurizing milk is a crucial step to ensure safety and achieve the right consistency and taste in your dairy concoctions.
With a small milk pasteurization machine, the process becomes seamless, offering you the convenience to craft a variety of dairy delights right in your kitchen. From the tanginess of fresh yogurt to the rich texture of homemade cheese, mastering this process allows you to transform fresh milk into delicious, wholesome treats.
Making cheese and yogurt at home isn't just a gratifying experience, it also gives you control over the ingredients, such as the milk source and the cultures you use. Whether you're aiming for hard cheeses with bold flavors or creamy yogurt with a delicate tang, proper technique and the right equipment are fundamental. The investment in a reliable pasteurization machine is key to ensuring consistently safe and high-quality outcomes every time.

Key Takeaways
- Pasteurizing milk is essential for safe and consistent cheese and yogurt making at home.
- A small milk pasteurization machine simplifies the process, making it accessible and convenient.
- Home pasteurization gives you creative control over the final product's taste, texture, and ingredients.
Basics of Milk Pasteurization
To ensure the safety and enhance the flavor of your homemade cheeses and yogurt, understanding milk pasteurization is crucial. It's a simple process that can make a world of difference in your dairy creations.
Understanding Pasteurization
Pasteurization is a heat treatment process that destroys harmful bacteria in milk without affecting its nutritional value or taste. By heating the milk to a specific temperature for a set time, you eliminate potential bad bacteria that can cause illness. The FDA has established guidelines requiring that milk be heated to at least 161 degrees Fahrenheit for at least 15 seconds, or 145 degrees Fahrenheit for at least 30 minutes for traditional pasteurization.
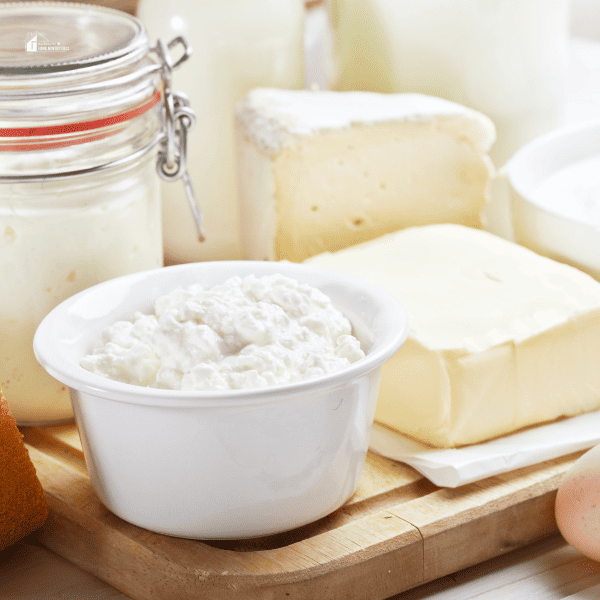
Selecting the Right Milk
Choosing the right type of milk is essential for both quality and taste. You can use whole milk, skim milk, or milk from local farms such as Organic Valley or other local milk. It's important to know that organic and local varieties often provide a richer flavor profile, which can enhance your finished product. The type of milk also affects the levels of milk protein and lactose, which are key to the texture and taste of your cheese and yogurt.
Setting Up the Pasteurizer
Setting up your pasteurizer involves a few key steps:
- Ensure your thermometer is accurate and properly calibrated.
- Fill the heater with water to create a protective water layer around the milk container, promoting even heating and preventing scorching.
- Heat the milk slowly to the recommended pasteurization temperature, usually around 161 degrees Fahrenheit.
- Hold this temperature for the time specified to complete the pasteurization process.
- Cool the milk rapidly after pasteurization to preserve freshness and halt the growth of any residual bacteria.
For those looking to invest in a pasteurizer, many options are available, including small-scale devices from Milky Day which are suitable for home use.
Cheese and Yogurt Making
Embarking on the journey of creating cheese and yogurt at home can transform your culinary experience. Utilizing a small milk pasteurization machine, you’ll control ingredients and taste, achieving that perfect blend of texture and tanginess.
Creating Homemade Yogurt
To start making homemade yogurt, you will need pasteurized or raw milk and yogurt cultures. These cultures are bacteria that ferment the milk, creating yogurt. Follow these steps to ensure the process is a success:
- Heat your milk to around 180°F on the stove to kill any unwanted bacteria and to change the protein structure for better curd formation.
- Cool the milk to about 110°F, then add the yogurt cultures; these could be from a commercial yogurt or a packet of starter culture.
- Pour the mixture into mason jars or a yogurt maker, maintaining an incubation temperature between 100-110°F.
- Allow the yogurt to set, usually for 4-12 hours; the longer it sets, the thicker and more tangy it will be.
- Refrigerator storage is essential to halt the fermentation process and set the yogurt, extending its shelf life.
If you’re aiming for a thicker yogurt, like Greek-style yogurt, strain your yogurt through a cheesecloth in a colander over a bowl to remove the whey.
Art of Cheese Making
Cheese making is a skill with endless possibilities, from creamy ricotta to firm cheddar or stretchy mozzarella. The process differs from that of yogurt, with the addition of cheese culture and rennet, which assist in coagulation.
- Start by heating your milk gently; the fat percentage and starting temperature can affect the final cheese texture.
- Add your cheese culture and allow the milk to ripen, creating flavor and aiding curd formation.
- After the culture has worked, add rennet to coagulate the milk into curds and whey. Rennet quantity and incubation time are critical for this step.
- Cut the curds to the desired size; smaller curds will result in a firmer cheese.
- Separation: Carefully remove the whey and transfer the curds into a mold or press them to form your cheese shape.
- Age your cheese if necessary. Some cheese, like feta, need to be aged for several weeks to develop the desired flavor and texture.
Remember, making homemade cheese gives you the freedom to experiment with different flavorings, herbs, or spices to create a unique product far removed from standard supermarket offerings. It’s not just food preparation—it’s a form of culinary magic.

Conclusion
With your own small milk pasteurization machine, you've gained the freedom to create delicious cheese and yogurt in the comfort of your home. Embrace the simplicity of this process and the satisfaction of enjoying your handmade dairy products. Remember, patience and attention to details yield the finest flavors in both cheese and yogurt making. Embarking on this homemade dairy journey can lead to healthier, customizable, and cost-effective alternatives to store-bought options.