
How to Plan a Kitchen Cabinet Makeover on a Budget Without Replacing Everything
This post may contain affiliate links which might earn us money. Please read my Disclosure and Privacy policies here
The cabinet doors look dated, one drawer sticks, and the cupboard beside the sink has seen better days. It is tempting to price an entirely new kitchen. First, separate the problems you can fix from the parts that genuinely need replacing.
A budget cabinet makeover starts with an inspection and a clear spending limit. You may be able to keep the layout, refresh the finish, and replace only a damaged or impractical section.
The goal is to spend on changes you will notice every day without paying twice for work that does not solve the problem.
Sort Your Cabinets Into Keep, Repair, and Replace
Empty the cabinets and inspect the boxes, backs, shelves, hinges, and drawer slides. Look closely around the sink and dishwasher for swelling, soft material, separating panels, or signs of an ongoing leak. Fix the source of moisture before spending money on cosmetic work.
Use removable labels to mark what each cabinet needs. A sound box with a worn finish may be worth keeping. A rubbing door could need hinge adjustment. A damaged drawer might need a replacement component rather than a whole new base unit.
Ask an installer to assess loose wall cabinets, badly distorted boxes, or uncertain support. Paint cannot restore structural strength. Take photographs and record dimensions so any repair or replacement quote refers to the same units.
If the boxes are sound but the door style bothers you, price replacement fronts or professional refacing separately. Refacing generally updates the visible surfaces while retaining the boxes.
Confirm door measurements, hinge compatibility, exposed-end treatment, and drawer-front attachment before treating it as a simple swap.
Replace Only the Section That Earns its Cost
If most cabinets are sound, identify the one area causing the biggest problem. That might be a damaged sink base, an awkward corner, or a cupboard that offers poor access to everyday cookware.
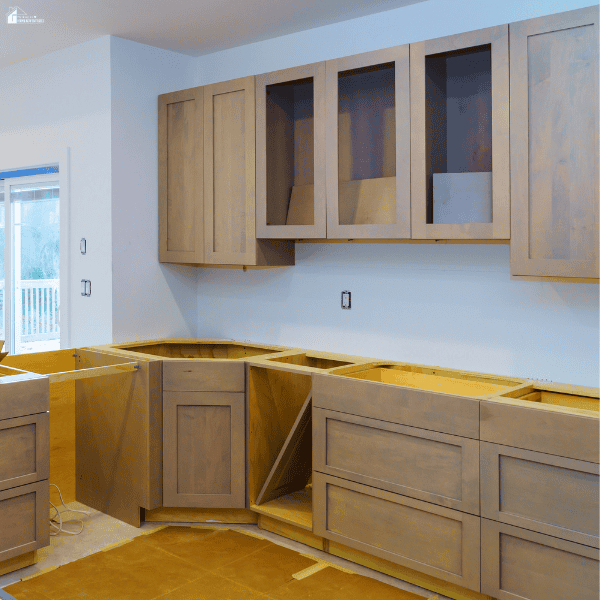
For a section that needs new boxes, ready-to-assemble cabinets for kitchen renovations are an option to compare with repairing the existing units. Include assembly, installation, delivery, fillers, and finishing panels in the comparison. The cabinet price alone will not describe the project cost.
Check how a replacement meets the retained cabinetry. Height, depth, toe kicks, door profiles, and countertop support all need attention. Removing a base cabinet beneath an existing countertop may require professional support or countertop removal. Have that sequence assessed before ordering.
Set a Budget for the Complete Job
Write down your spending limit before choosing paint or hardware. List essential repairs first, then the improvements you would like if money remains. Our advice on renovating a kitchen within budget applies here: decide what the room needs before shopping for extras.
Include preparation supplies, paint, replacement parts, tools, delivery, disposal, and hired labor. Leave a reserve for issues uncovered during the work. Keep that money separate from the amount available for decorative upgrades.
When comparing professional help, request the same scope from each contractor. The FTC recommends written estimates describing the work, materials, completion date, and price. Ask what is excluded, especially repairs discovered after doors or drawers are removed.
Put your own time on the planning sheet too. A do-it-yourself finish may involve several sessions of preparation and coating, plus space to store doors between stages. Compare that commitment with a professional quote before assuming the lowest materials total is the most manageable option.
Choose a Finish Update the Surface Can Handle
Cleaning may improve cabinets more than expected. Use the existing finish manufacturer’s recommended method, then reassess the color and condition in daylight. You may decide a hardware change is enough.
If painting makes sense, identify the surface first. Solid wood, veneer, laminate, and previously painted cabinets can require different preparation and compatible products. Peeling coverings and swollen panels need assessment before coating. Try the proposed paint system on a suitable inconspicuous area or spare piece.
For older painted cabinetry in a pre-1978 U.S. home, check EPA guidance on lead-safe renovation before disturbing the coating. Once the surface is suitable, follow the chosen paint system’s cleaning, preparation, application, and curing instructions. Dry to the touch does not mean ready for normal use.

Update Hardware Without Creating Extra Repair Work
Measure the distance between the screw holes on existing pulls, from center to center. Choosing the same spacing can avoid filling and redrilling holes. Check screw length against the thickness of the door or drawer front, and test one handle before ordering a full set.
Hinges need closer matching. Door overlay, opening angle, mounting plates, and drilling details can affect compatibility. Photograph the existing hinge and note any model markings before buying replacements.
Repair function before adding accessories. Once drawers slide properly and doors close as intended, decide whether an organizer will help. Measure the usable opening and interior space, including plumbing and hinges, rather than relying on the outside cabinet width.
Make Old and New Cabinets Look Intentional
An exact finish match can be difficult, especially when existing cabinets have aged. Compare physical samples in the room. Check the door profile and sheen as carefully as the color.
If a close match still looks wrong, consider a deliberate contrast on a clearly defined section, such as an island or separate pantry. Repeat a compatible hardware finish to connect the areas. Avoid assuming a fresh coat of paint will hide differences in door shape or cabinet proportions.
Keep the countertop, backsplash, and flooring samples beside your cabinet choices. Buying those finishes again can expand a small project quickly. Confirm the cabinet plan works with the surfaces you intend to retain.
Schedule the Work Around Everyday Meals
Before removing doors, label each one and its hardware by location. Set aside protected space for painting or assembly, and keep a small collection of daily dishes accessible.
A workable plan also covers meals and cleanup. Our guide to planning a kitchen remodel around your routine can help you prepare for the disruption. Arrange professional work and deliveries before clearing the kitchen.
Finish repairs before cosmetic work, allow coatings their specified curing time, and test doors and drawers before calling the job complete. Keep receipts, paint labels, and replacement-part details. A successful budget makeover leaves you with cabinets that work better and a clear record of what to maintain next.
Choose a few simple meals that use the appliances and safe preparation space still available. Include any extra food costs in the project plan. Keeping the sink accessible for as long as the work allows can also make a phased cabinet makeover easier to live through.