
Organizing Your Paperwork Can Help Your Finances
This post may contain affiliate links which might earn us money. Please read my Disclosure and Privacy policies herePaperwork can pile up faster than you realize. Bills, receipts, school forms, warranties, and miscellaneous documents can quickly overwhelm even the most organized of us. If you want to start organizing your paperwork but don’t know where to begin, don’t worry—you’re in the right place.
This simple, step-by-step plan is perfect for anyone starting from scratch. By the end, you’ll have an organized system that helps you stay on top of things moving forward.
Why Organizing Paperwork Is Important
Before getting started, it’s helpful to understand why organizing paperwork matters. It’s not just about clearing the clutter—it’s about gaining control over your important documents.
When you know exactly where everything is, you save time, reduce stress, and avoid potential problems like late payments or losing crucial documents.
Imagine needing a medical record for a doctor’s appointment or a receipt for a warranty claim and being able to find it in seconds instead of rummaging through a pile of random papers. Organizing paperwork is about making your life easier and more efficient.
Additionally, organizing your paperwork can also save you money. Late payment fees, lost receipts for returns, or misplaced tax documents can add unnecessary expenses to your life. Having a system in place ensures you’re not wasting time or money.
What You’ll Need to Get Started
To organize your paperwork at home, you don’t need fancy tools or an elaborate filing cabinet. Start with the basics:
- A large, flat surface for sorting (like your kitchen table or a desk)
- A shredder or scissors for documents you no longer need
- Recycling bins for papers you’ll toss
- File folders or binders for organizing your documents
- Sticky labels or tabs to mark your categories
- A few pens or markers for labeling
Optional but helpful tools include a scanner for digitizing documents and color-coded file folders for better organization. Once you have your supplies ready, you’re set to begin.
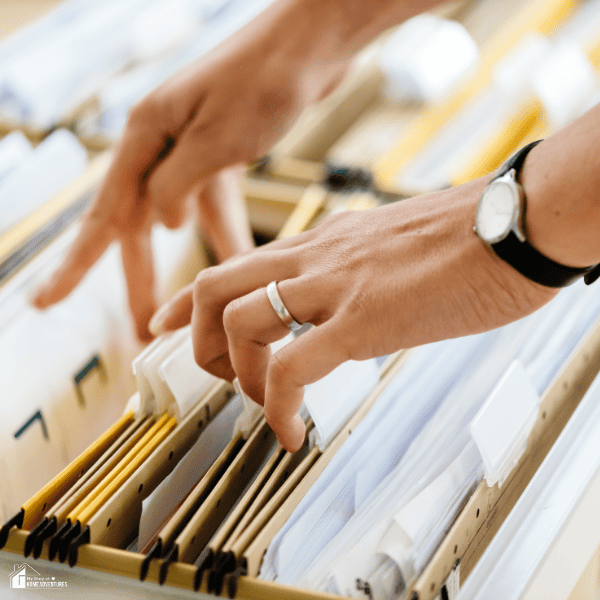
Step 1: Gather All Your Paperwork in One Place
The first step is to locate all the loose papers in your home. Look everywhere: drawers, countertops, backpacks, purses, and even old bags or boxes. Paper tends to accumulate in hidden spots, so don’t overlook those areas. Bring everything to your sorting surface.
The goal is to have everything in one place before you start organizing. It might feel overwhelming at first, but gathering everything now will save you time and effort later.
Step 2: Create Categories for Sorting
Now it’s time to sort through your pile of paperwork. Create categories that make sense for your household and needs. Some common categories include:
- Bills (both paid and unpaid)
- Receipts (tax-related, warranties, purchases)
- School papers (kids’ schedules, report cards, forms)
- Medical records (immunizations, test results, prescriptions)
- Important personal documents (birth certificates, passports, social security cards)
- Insurance policies (health, auto, home, life)
- Work-related documents (pay stubs, contracts, performance reviews)
- Miscellaneous (papers that don’t fit into a clear category yet)
Use sticky notes or small labels to mark these categories on your table or workspace. This step is key to ensuring you don’t lose track of where things belong as you sort.
Step 3: Decide What to Keep and What to Toss
This is where decluttering paperwork ideas come in handy. For every piece of paper, ask yourself:
- Is this document important or necessary to keep?
- Will I need this paper for tax, legal, or warranty purposes?
- Is there a digital version I can access instead?
What to Keep:
- Original copies of legal documents (birth certificates, marriage licenses, wills)
- Tax-related documents (keep for at least 7 years)
- Insurance policies and medical records
- Receipts for big-ticket purchases or warranty claims
- Any document that has sentimental or historical value
What to Toss:
- Expired warranties
- Old utility bills (unless needed for proof of address)
- Junk mail
- Outdated documents with no relevance
For anything you toss, shred documents containing sensitive information to protect yourself from identity theft. Papers without personal information can go straight into the recycling bin.
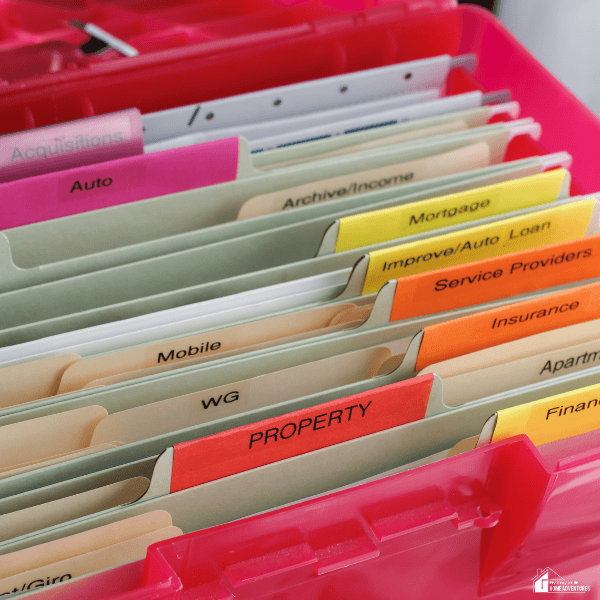
Step 4: Set Up a Filing System
Once you’ve decluttered, it’s time to set up a filing system that’s easy to use and maintain. Start by labeling your file folders or binders with the categories you created earlier.
- Use File Folders or Binders: Create a folder for each category and clearly label it. For example, you might have folders labeled “Medical Records,” “Unpaid Bills,” and “Receipts.”
- Sort by Date: For categories like bills and receipts, arrange them chronologically. This will make it easier to find specific documents in the future.
- Separate Active vs. Inactive Papers: Current or active documents (like unpaid bills or ongoing medical records) should be kept in a more accessible spot. Older or inactive documents can go into a longer-term storage solution.
If you’re a visual organizer, consider color-coding your files. For example, you could use blue for medical documents, green for financial records, and red for urgent items like unpaid bills.
Step 5: Go Digital When Possible
Reducing the amount of physical paper in your home is one of the best ways to stay organized. Many companies now offer paperless billing and statements. Sign up for these whenever possible to minimize clutter.
If you have a large amount of paperwork you’d like to digitize, use a scanner or a scanning app to create digital copies. Save these documents in labeled folders on your computer or cloud storage. For example, create folders named “Tax Documents 2025,” “Home Repairs,” or “Medical Records.”
Pro tip: Make sure to back up your digital files regularly. Save them to an external hard drive or a cloud storage service to avoid losing them if your computer crashes.
Step 6: Choose a Storage Solution
For physical documents, choose a storage solution that works well with your available space. If you have room, a small filing cabinet is a great option. Portable file boxes or binders with labeled tabs are perfect for smaller spaces.
For important documents like birth certificates, wills, and insurance policies, invest in a fireproof and waterproof safe. This ensures your most critical papers are protected in case of emergencies.
Step 7: Maintain Your System
An organized system only works if you maintain it. To keep things running smoothly, set aside a specific time each week or month to go through new paperwork. Sort, file, and discard anything unnecessary.
Make it a habit to deal with paperwork as soon as it enters your home. Open mail immediately, toss junk mail, and file important papers right away. Staying consistent prevents paperwork from piling up again.
Bonus Tips for Staying Organized
- Set Up a Mail Station: Create a designated spot for incoming mail. Use a simple tray or basket to hold items until you have time to go through them.
- Use a Calendar or Planner: Note important deadlines for bills, appointments, or renewals. Setting reminders ensures you never miss a due date.
- Keep a Shredder Handy: Shred junk mail or outdated documents as soon as you’re done with them to prevent them from piling up.
- Use Clear Labels: Clearly label your files, whether physical or digital. The clearer your labels, the easier it is to find what you’re looking for.
What to Do If You Fall Behind
If you find that paperwork starts piling up again, don’t panic. Sometimes life gets busy, and it’s easy to fall behind. Schedule a day to sit down and go through your papers again, just as you did when you first started.
Break the task into smaller chunks if it feels overwhelming. For example, spend 20 minutes sorting through one category or focus on one drawer at a time. The key is to stay consistent and remind yourself of the benefits of staying organized.
Organizing paperwork at home doesn’t have to feel overwhelming. By starting small and following these steps, you’ll transform your chaotic piles of paper into a streamlined, manageable system.
Whether you’re dealing with everyday bills or important legal documents, having a system in place will save you time, reduce stress, and give you peace of mind. Over time, staying organized will become second nature, and you’ll wonder how you ever managed without it.
Remember, the key to success is creating a system that works for you and maintaining it regularly. You’ve got this!


One Comment